What is Git?
Git is a distributed version control system designed to handle everything from small to very large projects with speed and efficiency. It allows developers to track changes in their code, collaborate with others, and maintain a history of every file’s revision. By keeping a record of changes, Git helps ensure that no work is lost, allows team collaboration, and simplifies the process of debugging by maintaining snapshots of code across different points in time.
Git is widely used in the development community, but one often overlooked aspect of Git is its ability to function completely offline. In situations where you’re working on an offline computer or a closed network, Git’s flexibility allows you to create local repositories and even simulate remote repositories for more advanced version control needs.
Why Git is Important?
Before we jump into setting up Git on an offline machine, it’s important to understand why Git is so valuable:
- Version Control: Git keeps track of every change made to your project, letting you go back to any previous state or version.
- Collaboration: With Git, multiple people can work on the same project simultaneously, without overwriting each other’s changes.
- Branching: Git makes it easy to create separate branches for experimental features or different project phases, without affecting the main codebase.
- Backup: Git acts as a backup for your project. Even if you delete a file, you can always retrieve it from the Git history.
Now that we know why Git is essential, let’s get started with how to install and set up Git, and then use it on an offline PC, using both a local repository and a simulated remote repository.
Installing Git
Before you can use Git, you need to install it. Here’s how you can install Git on various operating systems.
For Windows:
- Download the Git installer from Git’s official site.
- Run the installer and follow the default installation instructions.
- Once installed, open Git Bash from your Start Menu to start using Git.
For Linux (Ubuntu):
Open your terminal and enter the following command:
sudo apt update
sudo apt install git
For macOS:
- Install Homebrew if it’s not already installed:
/bin/bash -c "$(curl -fsSL https://raw.githubusercontent.com/Homebrew/install/HEAD/install.sh)"
- Then install Git using Homebrew:
brew install gitSetting Up Git (Configuring Username and Email)
After installing Git, it’s important to set up your username and email, which will be used to track changes in the project history. These settings can be global (for all projects on your machine) or local (for a specific project).
Set Global Username and Email:
- Open your terminal or Git Bash.
- Set your username:
git config --global user.name "Your Name"- Set your email:
git config --global user.email "your.email@example.com"Verify Your Configuration:
To check if your Git configuration is correct, run:
git config --listThis will display the username and email associated with your Git setup.
How Git Works on an Offline PC
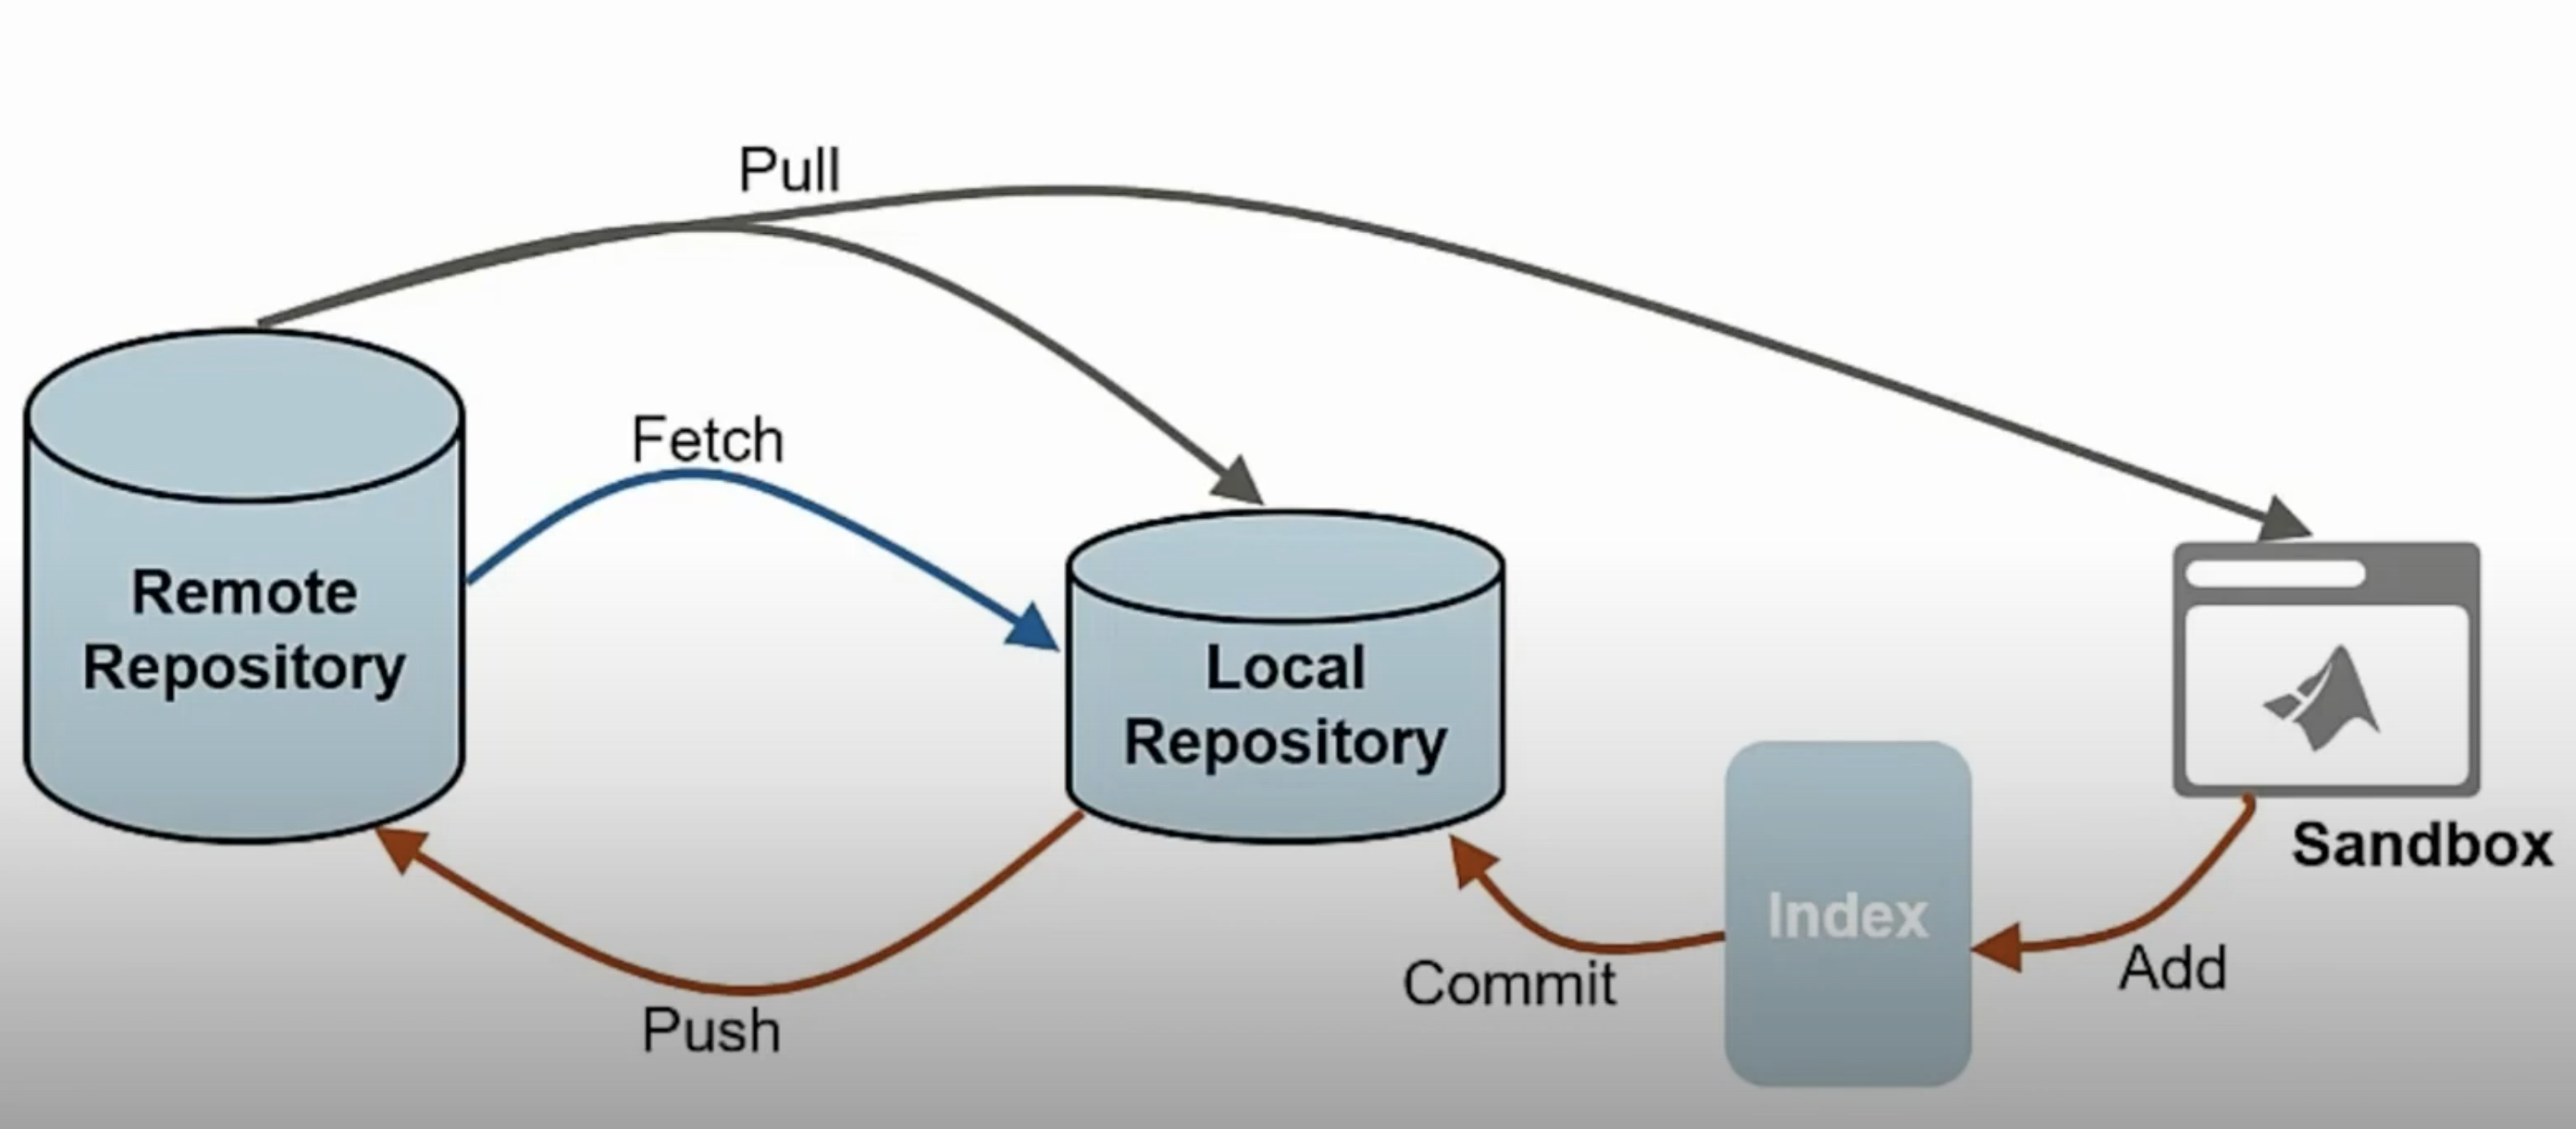
Git is designed to work both online and offline. If you’re in an environment where your machine is not connected to the internet, you can still use Git to manage your code through local repositories. Additionally, you can set up a bare repository on your local system to simulate a remote repository, enabling you to use advanced Git functionalities like pushing and pulling.
Setting Up Git on an Offline PC (Using Bare Repositories)
Let’s say you have an offline machine where you are coding in MATLAB, and you want to start using Git. You can follow these steps to create a local Git repository, simulate a remote repository (using a bare repository), and manage your code versioning efficiently.
Step 1: Initializing a Local Git Repository
A local repository is where you work with your code and commit changes as you develop. This repository is tied directly to your working directory (the folder containing your code).
- Navigate to Your Project Directory:
Open your terminal or Git Bash and change the directory to where your code is stored:
cd /path/to/your/project- Initialize Git in Your Directory:
Initialize your folder as a Git repository by running:
git initThis will create a hidden .git folder inside your project directory, which contains all the information Git needs to manage your project (such as commits, branches, etc.).
- Add Your Files to Git:
Add your existing code to Git’s staging area:
git add .- Make the Initial Commit:
Commit your changes with a message:
git commit -m "Initial commit of my project"At this point, your project is under Git’s version control, and all your changes will be tracked.
Step 2: Creating a Bare Repository (Simulating a Remote Repository)
A bare repository is a special kind of Git repository used for pushing and pulling between different working directories. Unlike a normal repository, a bare repository does not have a working directory; it simply stores the project’s history. Think of it as a simulated remote repository that lives locally.
- Create a Folder for the Bare Repository:
First, create a folder where you’ll store the bare repository:
mkdir /path/to/remote/repo.git- Initialize the Bare Repository:
Navigate to that folder and initialize it as a bare repository:
   cd /path/to/remote/repo.git
   git init --bare
This will create a repository designed for pushing and pulling but without any code files or working directory.
Step 3: Linking Your Local Repository to the Bare Repository
Now, you need to link your working directory (where your code is stored) to the bare repository (acting as the remote repository).
- Set the Bare Repository as Remote:
In your working directory (where your project is located), add the bare repository as a remote:
git remote add origin /path/to/remote/repo.gitThis establishes a connection between your local repository and the bare repository, so you can push changes to it.
Step 4: Pushing Code to the Bare Repository
After you’ve added the remote, you can push your local changes to the bare repository, simulating the behavior of pushing to a remote server like GitHub or GitLab.
- Push Your Code:
Push your code to themasterbranch of the bare repository:
git push origin masterNow, your code is safely stored in the bare repository, ready to be pulled by other local repositories or directories.
Step 5: Working with Multiple Local Repositories
If you need to work from a different directory or simulate collaboration between different users (all while offline), you can clone the bare repository into a new folder.
- Clone the Bare Repository:
Create a new folder and clone the bare repository into it:
   mkdir /path/to/another/project
   cd /path/to/another/project
git clone /path/to/remote/repo.git .- Pull and Push Changes:
You can now make changes to your project in this new working directory, commit those changes, and push them to the bare repository. Similarly, you can pull changes from the bare repository if other collaborators have made updates.
Conclusion
By using Git on an offline machine with local and bare repositories, you can take advantage of version control, collaboration, and code management without needing an internet connection. This setup mimics how remote repositories like GitHub function, but everything remains on your local machine, ensuring that you can maintain full control over your code even in isolated or secure environments.
Git’s flexibility ensures that whether you’re working alone or in a team, online or offline, your projects are safely version-controlled and ready for the future.